Want to keep your website safe from all malware and cyber attacks? Well, you’ve come to the right place! Welcome to WP Devs, to help out on your WordPress Site needs! For today’s tutorial, we’ll be focusing on installing Wordfence Security plugin on your site.
Your site’s safety should be one of the main priorities when constructing a website, although these attacks inevitable, it can be avoided by scanning your sites with plugins such as Wordfence.
Step 1: Install and Activate the Plugin

Head over to plugins and click the “Add New” button\

Search for Wordfence on the search bar
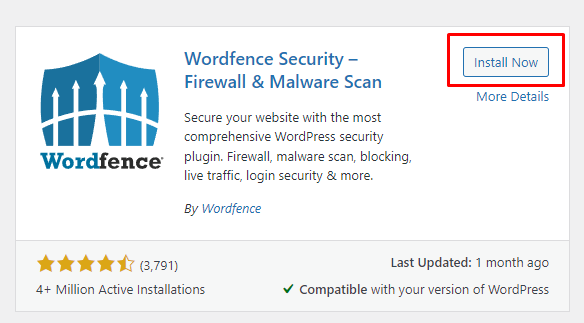
Look for the plugin [basing on the photo above], then click install. Once installed, click on activate.
Step 2: Access the Plugin Dashboard
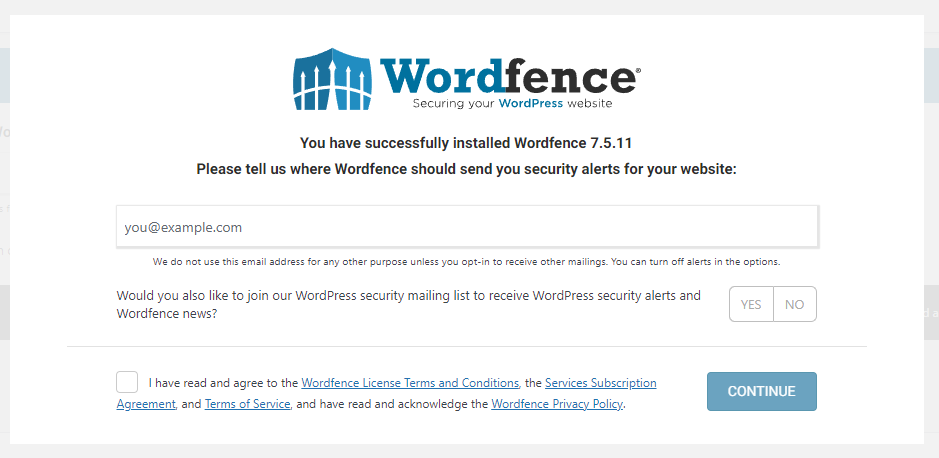
Once activated, you will get the following prompt, add the email where you’d like the plugin to send emails to and agree to its terms and conditions.
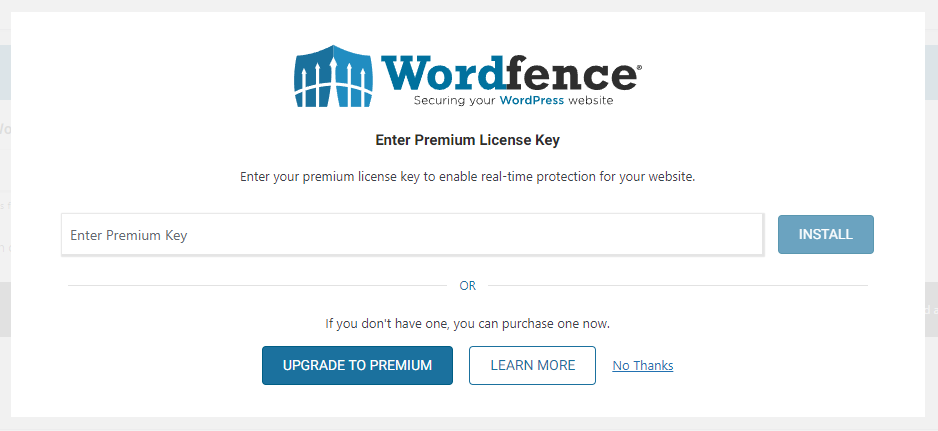
You don’t need to buy a license for this one, but in case you do have, you may input the premium key here.
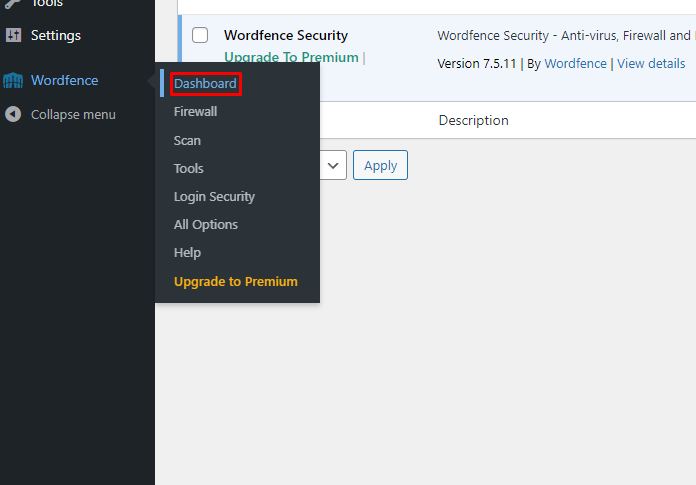
After inputting the information needed, go the Wordfence and click on the “Dashboard button”. You’ll be able to see this option after activating the plugin.
You now have Wordfence activated, the rest of the steps are optional but highly recommended to keep you website safe.
Step 3: Optimize the Wordfence Firewall
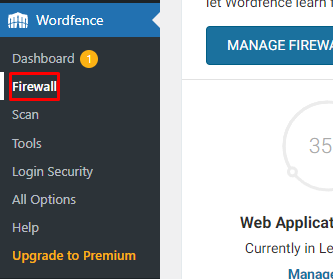
Head over to Firewall under Wordfence.

Click on “Click to Configure”
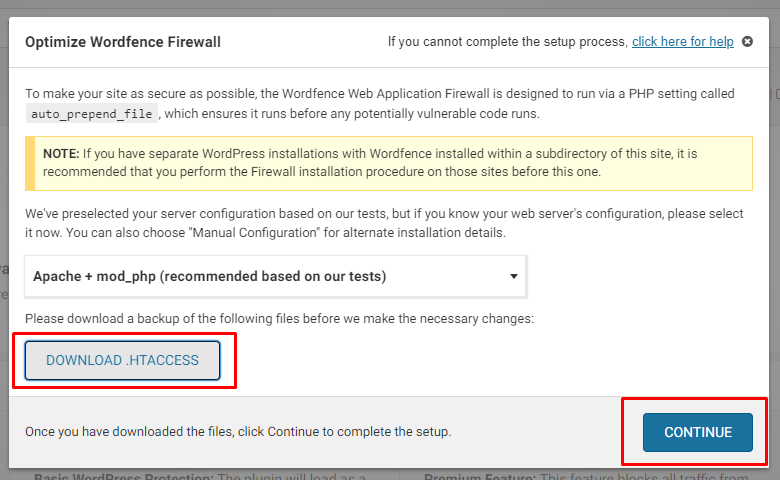
A popup box will appear with some information in it. The system will run a test to determine the best settings to use. You may pick your own, but I would recommend following Wordfence’s recommendation. Click on download .HTACCESS then click on Continue.
Step 4: Set Up Two-Factor Authentication
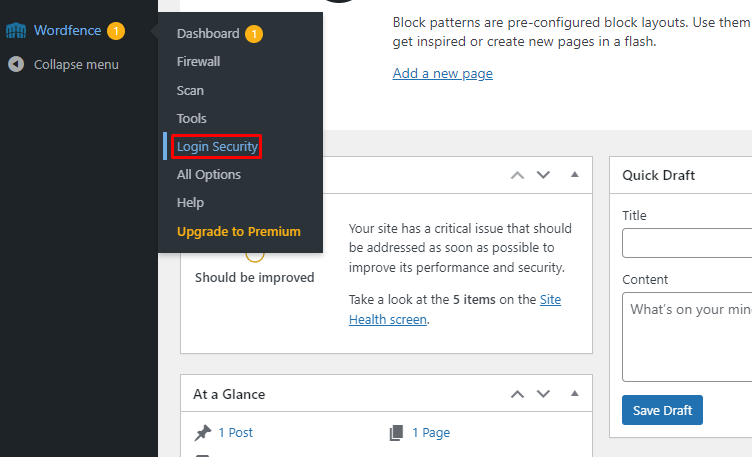
Click on the “Login Security” link.
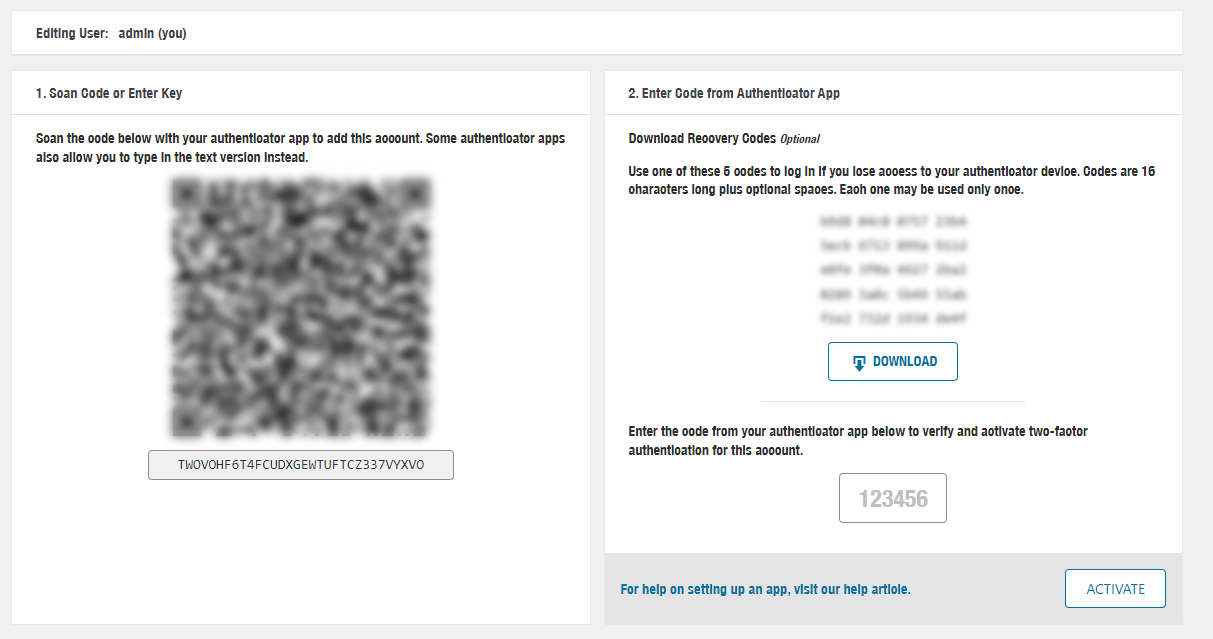
Using your authenticator app, scan your respective QR code, then enter the code from the app into the lower right section.
Step 5: Performs scan when needed
Scans are usually done frequently, to prevent the spread of viruses and cyber attacks through out your site.
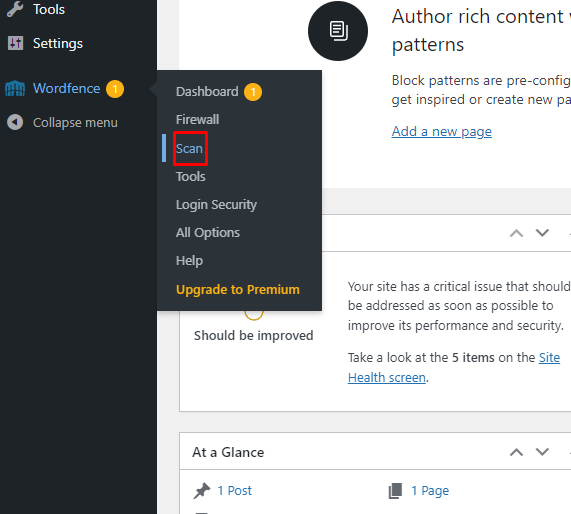
Head over to “Scan” under Wordfence
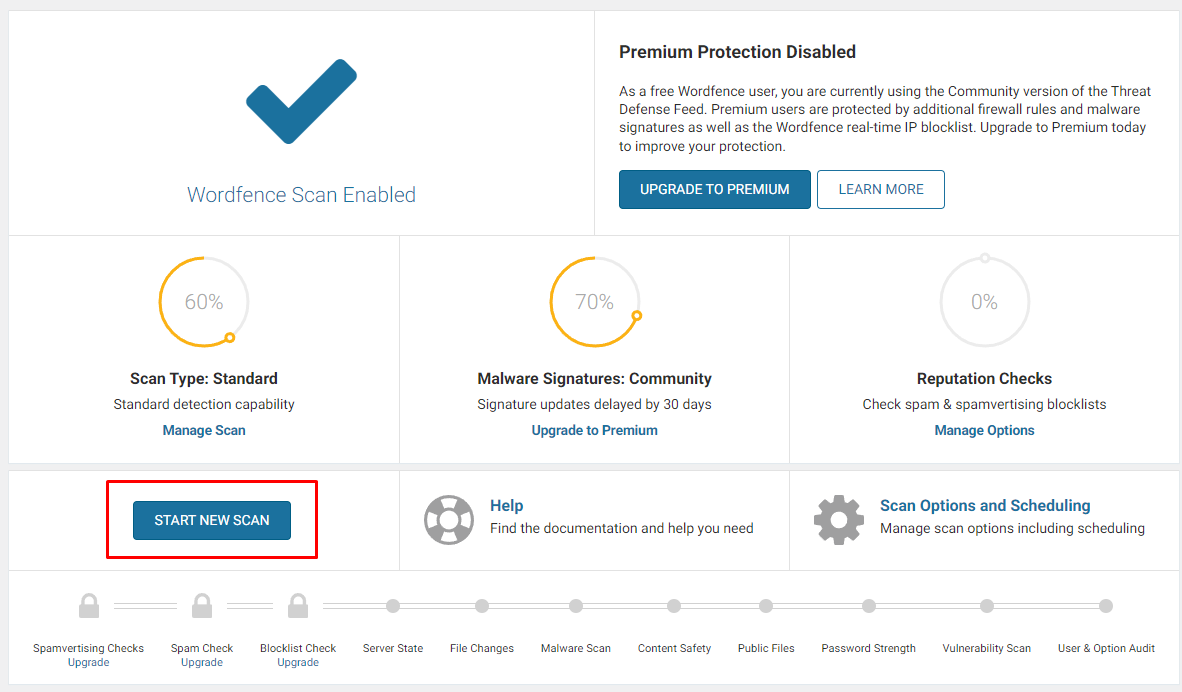
Click on “Start New Scan” to scan the website, this may take a while and make sure to stay on the window while the scan is in process.
That wraps up our tutorial on how to install and activate Wordfence Security plugin in your WordPress site. Don’t forget to follow our social media accounts to get more information you need regarding website development! See you in our next Tutorial!


